Simple drawings on the nails can be boring, but to get some kind of artistic image you need a lot of money and patience.
Because the work of professional nail designers is not cheap, and a pattern on one nail can take about an hour.
But those who want to have an original manicure can try a slider design for nails, which involves the use of special, thinnest stickers with various pictures.
Nail Slider Design - What's the Difference
Translated from English, the word slider means "slide." Nail sliders are the thinnest stickers on a transparent basis with a printed pattern. Sometimes among them there are such images that are almost impossible to reproduce manually.
A distinctive feature of sliders from thermal films for nails is the method of application. Thermal stickers are heated under an incandescent lamp and only after that are applied to the surface of the nail. They hold badly and are quickly scratched. The slider design for nails in this regard is more reliable, because it is performed on and under the gel polish. Those. the fixation is colossal.

The second difference between sliders and other types of nail stickers is the naturalness of the image and the presence of small elements in the picture. For example, stamens and pistils in flowers or eyelashes and freckles in painted girls. Among the variety of options, you can find surprisingly realistic drawings that look like a photograph or a picture. In a word, a real work of art on nails.
Slider design for nails - different directions
Girls admit that it is very difficult to determine the next pattern. Especially picky, the selection process takes several minutes. After all, the assortment is so wide and varied that the eyes run wide. We offer you to familiarize yourself with the main directions in the slider design for nails.
Nature
Colorful leaves, twigs of flowering trees or whole landscapes. Such patterns are popular with romantic girls who know how to appreciate the beautiful. Young women with a cheerful disposition like to put on their marigolds an image of juicy fruits or berries. This is a great option for summer manicure. And if you stick watermelons or strawberries on your nails in the winter, you can return nostalgic memories of the summer.

Thematic subjects
The slider design on the nails is perfect for a theme party or any holiday. For example, for the new year, you can decorate the nails with images of Santa Claus, a snowman, Christmas trees, gifts or tangerines. Those who are interested in equestrian sports can choose sliders with horses. A sailor’s wife or girlfriend can please her beloved with a manicure with anchors, a vest or an entire ship.

Flowers
Flower sliders are perhaps the most popular. And their range is also very diverse. Some like individual flowers, while others like collected bouquets. Modest cornflowers or bright red poppies? Charming daisy or proud rose? What do you choose?

Abstract patterns
Fans of the avant-garde art genre and just girls who do not like to attract attention will choose a slider design for nails with the image of abstract drawings. Many still call them cosmic.

Fairytale heroes or celebrities
Those who want to temporarily fall into childhood can depict Winnie the Pooh with Piglet or cute Smurfs on the nails of their childhood favorites. For grunge manicure or an art house, photographs of celebrities, for example, members of the Beatles group or the beautiful Marilyn Monroe, are suitable.

Animals or imitation hides
Fauna lovers can choose a cat, monkey, panda or leopard (tiger, zebra) pattern as a slider design for nails. Why not?

Other popular areas of slider design:
• ornate patterns and weaves;
• symmetric and asymmetric geometric ornaments;
• silhouettes of people and animals;
• butterflies;
• owls;
• painting under Gzhel, Khokhloma, etc.
Nail slider design: sequence of actions
Learning to do such a manicure at home is not easy. This will require extreme accuracy and perseverance. Films are very thin, they are easy to tear, so the work will be jewelry.
It’s best to stick sliders under gel polish. Due to the fact that the coating is polymerized in the lamp, the sticker will be fixed more securely and will last until the manicure. Let's try to perform a classic slider design for nails in stages.
What is needed
Because This is a manicure with gel polish, we need the following:
• degreaser;
• base (primer);
• top (finish);
• base (for gluing the sliders, white color is most often used, although original and unexpected solutions are sometimes obtained on a colored substrate background);
• adhesive remover;
• lint-free napkins;
• ultraviolet lamp;
• tools: files, buffs, grindings, orange sticks;
• sliders for nails;
• a glass of plain water;
• nail scissors;
• manicure tweezers.
By the way! Performing a slider design on all nails is optional. Today it’s fashionable to focus on one or two fingers. It will look original and save time.
Training
Before sticking a slider on the nail, we make the base manicure gel varnish.
1. Give the nails a shape.
2. Grind the shiny layer and grind the surface.
3. Degrease the nails.
4. We cover the nails with a base (primer) and wait 1-2 minutes.
5. Apply a transparent base with a thin layer. We polymerize in a UV lamp.
6. Remove the sticky layer with a special tool. For this we use lint-free napkins.
7. Apply the base under the slider. White or another color. We polymerize in a UV lamp.
8. We cover the nails with the top (finish), polymerize it.
The turn of the slider design for nails comes. Please note that we polymerized the top coating in the UV lamp, but the sticky layer has not yet been removed. It is on him that we will stick the slider.
Perform slider design
The sequence is as follows.
1. Cut out the drawing you like with manicure scissors so that it approximates the shape of the nail. If you want to cover with a pattern not the entire surface of the nail plate, but only the tip or, for example, the side, you should cut out a fragment of the image.
2. The cut piece is soaked in water (30-50 seconds) or placed on a damp cloth. Our goal is to separate the transparent slider layer from the paper backing.
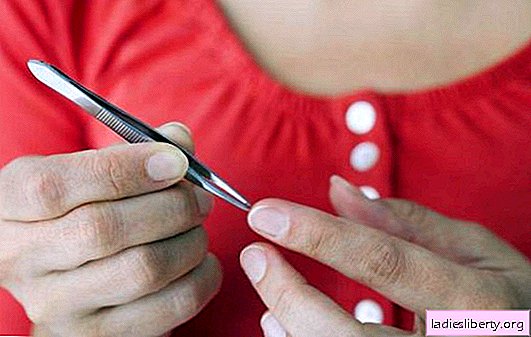
3. Carefully tweezers peel off the image from the paper and transfer it to the nail plate. We emphasize: apply the slider to the sticky layer of the top coating!
4. Press the image to the nail.
5. Top cover with finish and cure in the lamp.

Cutting the sticker exactly along the contour of the nail is extremely rare. Therefore, usually the pattern extends beyond the nail plate. In this case, you need to cut the slider with a nail file. Attention! Sawing is done only after polymerization, when the sticker is finally fixed on the nail.
Slider design is ready. It remains to carry out similar manipulations with the remaining nails.
Nail Slider Design: Professional Tips
Neil designers who have been working with sliders for a long time are constantly improving their skills. Professionals have many different tricks that they use to get the best result: a stable and reliable coating of nails with sliders.
Alternative Slider Designs
We learned that sliders can be glued onto the sticky layer of top coat. But there are two alternatives.
To an Un Dry Base
Suitable for those who decide to stick the picture not on a color base, but on a transparent one. Those. we again begin regular manicure with gel polish, but stop at the stage of applying the base.
1. Place the slider in the water.
2. We cover the nails with the base.
3. Without drying the base in the lamp (this is important), apply a slider to the nail. You should work very carefully, because it will be difficult to distribute a sticker on a liquid coating. It is best to use a brush so as not to damage the picture.
4. After placing the slider on a liquid base, you can polymerize the nail in a UV lamp.
5. Top cover with two layers of finish, polymerizing each in turn.
On the finished coating
This option is good for those who have been walking with a ready-made gel polish manicure for some time. If you suddenly wanted to decorate it with a slider design, this is quite possible.

An ultrabond is required to grip the slider with the finished coating. It acts like double-sided tape: it sticks well to the nail, and is also an excellent base for stickers. Another plus of this coating: it lays in a thin layer and does not thicken the nail. Soak the slider and apply it to the polymerized ultrabond. We fix the base and finish from above.
Nail Slider Design: Tricks
And finally, a few recommendations that will make the slider design for nails perfect and durable.
1. When applying the base, base and finish, it is important to thoroughly coat the edge of the nail. In the nail industry, this is called sealing. This is necessary so that the nail does not exfoliate, and the slider does not move away.
2. Do not break a thin transparent sticker with a pattern will help the foam applicator. He will be able to gently and reliably press the slider to the nail without distorting or damaging it. In extreme cases, you can use a flat brush.
3. Sawing of the protruding sections of the slider is carried out in the direction from the edge of the nail at an angle of about 45 degrees. Movements are made in one direction (not round-trip, but only there). Otherwise, you can damage the picture and spoil all the beauty.
4. When distributing the slider over the nail plate, a 1 mm gap should be left at the edges. This is necessary so that the sticker is well fixed on the nail.
5. If you want to further decorate the slider design with varnish or decorative elements (rhinestones, dust, sparkles), you need to do this after the sticker is covered with a layer of base or top.
6. Soaking water should be warm (not hot). So the stickers will be better and faster to move away from the base.
7. In case of unsuccessful drawing of the slider (crumpled, torn, covered the wrong part of the nail that I wanted), you need to either remove the sticker at all, or somehow mask it with additional decor.
The finished slider design will please you for at least two weeks, if everything is done correctly and according to the instructions. Immediately after the end of such a manicure, it is not recommended to wet your hands for 30-40 minutes. This time is necessary for the complete drying of micro-areas that were poorly stained or sealed. The slider design is removed just like a regular gel polish: first with a special tool, and then by sawing.

