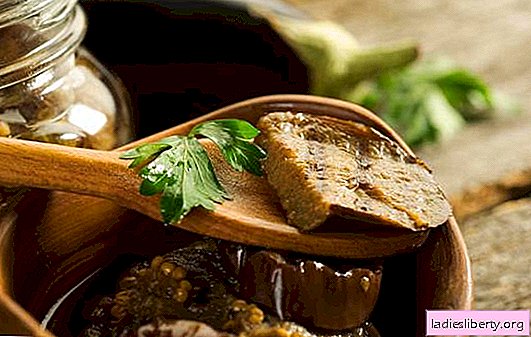
Jellied meat, or, as it is also called - jelly, can be cooked from any set of meat products. We offer to cook jellied chicken so beloved by many.
Step-by-step recipes will tell you how to cook jelly from a home chicken, a purchased broiler or individual parts of a bird without unnecessary trouble. In what cases it is worth introducing gelatin into chicken jelly or how to do without it.
In the selection of jellied chicken recipes, three options for its preparation are described step by step: in a pan, slow cooker and pressure cooker. Each method is good in its own way. Cooking in a slow cooker and pan is practically no different. A slow cooker frees the hostess from constant supervision of the aspic. When using a pressure cooker, cooking time is halved.
Chicken jelly (step by step) - general principles of preparation
• If the task is to cook jellied poultry in a significant amount, usually use a whole carcass. It is permissible to cook jelly from its individual parts that have a sufficient amount of cartilage and bones, which during prolonged cooking emit the greatest amount of gelling (sticky) substances.
• Certainly, home-laying hen, under the age of three years, will be the best product for making delicious quick-setting jellied meat. Jelly from store boilers turns out to be less saturated and its preparation requires a special approach, as the jelly can not freeze even after long cooking. But here there are subtleties. Gelatin is usually added to such jellied meat or pork knuckle is put.
• The key to a tasty, transparent, well-setting jellied meat is properly cooked broth. Before preparing it, the bird or its individual parts are washed with water, while removing the rest of the feathers and carefully cleaning the contaminated places. It is recommended that the chicken be soaked for some time in water in order to remove the remaining clotted blood in this way. To do this, chopped bird must be placed in a wide pan, and, pouring cold water, leave in it for at least an hour. After soaking, the carcass is washed repeatedly.
• Chicken is cooked in a spacious container, filled only with cold water. Before the boil begins, curled protein is necessarily removed. It periodically rises to the surface in the form of foam. It is important not to overfill the container with meat, and pour water so that it covers the chicken meat by at least 4 cm.
• Salt broth for jellied meat should be slightly stronger than for soup or another dish, and preferably at the end of the process. Vegetables and spices are added first, when laying meat or after boiling. To make the broth clear, do not let it boil vigorously.
• It is not recommended to add a lot of spices to the chicken jelly. For two kilograms of meat parts it is enough to put four peas of black and two allspice, plus two leaves of parsley. For color and flavor, one carrot and no more than one onion. You can add a small celery root.
• Cook homemade chicken jelly in a pan or slow cooker for at least five hours, only in this case it will solidify well. A pressure cooker halves cooking time.
• The chicken is cooled in the broth to a temperature that allows it to work comfortably with your hands. The meat and bones are pulled out and cut, and the broth is filtered. Vegetables and spices are removed, carrots are left to decorate jellied meat.
• Chicken cut into small pieces or fiber-sorted is laid out in a uniform layer along the bottom of the containers so that the meat takes up to a third of the volume. Then lay out additional components, such as eggs, canned peas and carrot sliced in rings. After that, everything is poured with a well-cooled broth - it should be twice as much meat. For hardening, the aspic is placed in the cold. Cooked according to all the recommendations in step-by-step recipes, the chicken jelly will solidify no later than 4 hours later.
Jellied chicken: step by step from poultry without gelatin
Ingredients:
• fresh domestic chicken - 2 kg carcass;
• large onion;
• carrots - two small root crops;
• a small head of garlic;
• 100 gr. celery roots
• three whole peas of allspice;
• four hard-boiled eggs;
• two large bay leaves;
• for decoration leaves of fresh parsley.
Cooking method:
1. Before cutting the poultry, the carcass must be scorched and this can be done over the burner. We turn on the intense fire, holding the chicken by the legs, bring the carcass over the fire. Slowly moving and turning, we singe every large area of the skin. After that, we wash the skin well with warm water and chop it into four parts. Rinse the pieces thoroughly with cool water, removing the kidneys and lungs. Put the prepared chicken in a spacious enameled pan, pour the filtered water 4 cm above the chicken.
2. Put the pan on the stove, turn on the maximum fire. Before boiling, we collect the protein curled into foam from the broth. Having waited for an intense boil, immediately set the minimum heating, lower the lavrushka and allspice into the broth. Close the pan tightly, wait a couple of minutes, then check the boiling intensity. So that most of the broth does not evaporate during a long cooking, and the meat is completely boiled, the surface of the broth should "wave" evenly and barely noticeable. The presence of air bubbles rising from the bottom of the pan is necessary; their absence indicates insufficient heating. After making sure that the heating temperature is set correctly, we leave the future aspic to slowly languish under the lid.
3. At the bulb we cut off the remains of the roots, without peeling the husks, wash it well with warm water. We clean the carrots and celery root, cut the carrots into pieces. Dip the prepared vegetables and roots into the broth after four hours from the moment of boiling. Add 1.5 tablespoons of salt to it and cook another hour and a half.
4. Ready broth for aspic, after switching off, leave without a lid. It needs to be brought to room temperature or slightly higher, so that the chicken that cools down in it is comfortable to disassemble by hands.
5. Carefully remove the chicken from the broth with a slotted spoon. The meat, as a rule, departs well from the bones, and the pieces can easily fall apart. We sort chicken into fibers or finely cut with a knife. Put in a bowl.
6. From a well-cooled broth we extract onions, carrots and roots. Throw the onion and celery, leave the carrots for decoration. We pass the broth through cheesecloth folded in two layers.
7. We wash serving dishes with warm water: plastic containers, pans or deep plates. We thoroughly wipe them with a towel and evenly spread pieces of chicken meat along the bottom of the containers.
8. We cut the boiled carrots into rings. Jellied meat will look spectacular if you cut out figures in the form of leaves or flowers from carrots. Hard-boiled eggs are cut lengthwise into six parts.
9. We arrange the prepared design elements asymmetrically for the meat, complement the design with parsley leaves. In each container, passing through a press, add garlic, add the cooled broth.
10. After complete cooling, we move the jellied containers into the refrigerator, and let it cool well. This may take up to five hours. Be sure to cover the dishes with lids or tighten with cling film so that the jelly does not absorb foreign odors.
Jellied chicken: step by step in a slow cooker (with gelatin)
Ingredients:
• chilled chicken - 1.8 kg;
• 20 gr. instant gelatin granules;
• large onion;
• one carrot;
• two leaves of parsley;
• canned green peas;
• two boiled eggs;
• 5 peas of pepper;
• one and a half liters of drinking water.
Cooking method:
1. Inspect the skin of birds. Carefully clean the contaminated area with a knife, remove the remaining feathers with tweezers. We chop the carcass into pieces - four parts are enough, thoroughly rinse with cool water and immerse in the multicooker bowl.
2. Peel the onions and carrots. Cut the onion in half, if the carrot is large, cut in half and it. Lower the vegetables to the bird.
3. Pour one and a half liters of cold drinking water into the bowl. We activate the option "Baking". Bringing to a boil, regularly remove protein curled into foam from the surface of the future aspic. We carefully remove the foam, do not touch the contents of the bowl.
4. After boiling, reprogram the multicooker to the "Extinguishing" mode and lower the lavrushka with peas of pepper into the broth. We set the timer to 5 hours, set the temperature to 100 degrees. We close the lid and calmly do other things.
5. Twenty minutes before the jelly is ready, you need to prepare the gelatin. Pour its granules into a small bowl, fill in a little water and leave. The granules should swell well, otherwise the gelatin will disperse poorly in the jelly and its addition will be pointless.
6. After the signal indicating the end of the program, remove the hob from the housing.
7. After cooling to the desired temperature (slightly above room temperature), we take out the chicken and sort it into fibers in small pieces. Filter the broth into a clean pan. Throw onion, parsley and pepper, put the carrots aside.
8. In a water bath, dissolve the swollen granules of gelatin. Stir the gelatin mass until smooth, combine with the still warm broth and mix thoroughly.
9. At the bottom of the containers prepared for the spill of jelly, put a little green peas. Cut the eggs in half or divide lengthwise into six parts and carefully lay them between the peas. Spread chicken on top with an even layer. We cut the boiled carrots into rings, put them on the meat. You can skip this step if you wish.
10. Pour the cooled broth into small bowls and remove them in the “general” section of the refrigerator. Jellied chicken with gelatin will freeze in about 4 hours.
Jellied chicken: step by step in a pressure cooker with pork knuckle
Ingredients:
• pork knuckle, weighing up to a kilogram;
• two small chicken legs;
• three liters of drinking water;
• onion head;
• two leaves of parsley;
• head of garlic;
• two peas of allspice and five peas of black pepper;
• large carrots, unsweetened varieties.
Cooking method:
1. Carefully scrape the skin of the shank with a knife, if there are ink prints, be sure to remove them. We rinse with warm (not hot) water, lower it into a pressure cooker. We wash the legs, remove the remaining feathers and be sure to cut out the gland from the rump (tail). From the lower cartilage of the leg, remove the yellow, keratinized skin, rinse again and put it on the shank.
2. Peel the carrots, rinse, cut into three parts. We clean the onions, wash the leaves of laurel with water. Without sorting into the prongs, remove the top thin husk from the garlic and wash it. We omit the prepared components for meat, add allspice and black pepper with peas, add salt.
3. Add two liters of water to the pressure cooker, place it on an intense fire. Without closing the lids, bring to a boil. In the process, as it is formed, remove all foam from the broth. After waiting for intensive drilling, we set the average heating and, according to the instructions, set the lid on the pressure cooker. The main point - the first five minutes we do not move away from the pressure cooker. It is necessary to wait until the characteristic "hiss" goes out of the valve - it should not be strong.
4. Cook the aspic in a pressure cooker for two hours. Turn off the stove, do not open the lid until the pressure in the pressure cooker drops. After a quarter of an hour, you can lift the valve to let out the remaining hot steam, and then open it. Immediately after turning it off, you should not do this, along with the steam, hot broth can also run out.
5. Place a pressure cooker with broth in a bowl of cold water. Having cooled to the desired temperature, we take out the meat pieces and select bones from them. Filter the broth through cheesecloth.
6. We disassemble the meat into fibers, grind the skin from the shank and grind all veins with a meat grinder into a separate plate.
7. We place on the table bowls for jellied meat, lay out the meat, and then evenly distribute the ground mass over them. We pour the broth, carefully stir the contents of each plate. At this stage, for flavor, you can add a little crushed garlic to the jelly.
8. Cover the jellied containers with lids and place them in the refrigerator.
Jellied chicken (step by step) - cooking tricks and useful tips
• During cooking, you should not add water to the jellied meat, you should immediately determine its amount correctly and prevent evaporation of the liquid (cook only under the lid).
• Following the above recipes for jelly chicken, step by step, you can cook and diet jelly. To do this, while cutting the bird, remove the skin from it - this is its most high-calorie part. Also cut off all the fat and be sure to remove the wedge-shaped tail. In this way, you can not only reduce the calorie content of the dish, but also improve its appearance - there will be practically no fat layer on the surface of the frozen jelly.
• Jellied meat from any chicken will harden well without gelatin, if together with the bird or its individual parts cook about a kilogram of chicken legs. Their cartilage tissue contains many substances that gel the broth.
• Most cooks, in order to get a clear jelly, prefer to drain the first broth. In this case, chicken is poured with water, the broth is brought to a boil without removing the foam. Then it is drained, the chicken is thoroughly washed and put in a clean pan. After pouring and boiling the chicken jelly, step by step from the very beginning.